RocketCake is an excellent, free to download and use WYSIWYG HTML webpage builder.
It can be downloaded from https://www.ambiera.com/rocketcake/
In this tutorial we guide you through the basics of how to use RocketCake to create a simple webpage.
Let’s Start!

When you start RocketCake you are given access to a number of templates to help you start. We will be creating one from scratch so click on the ‘Empty Page’ option on the far left.

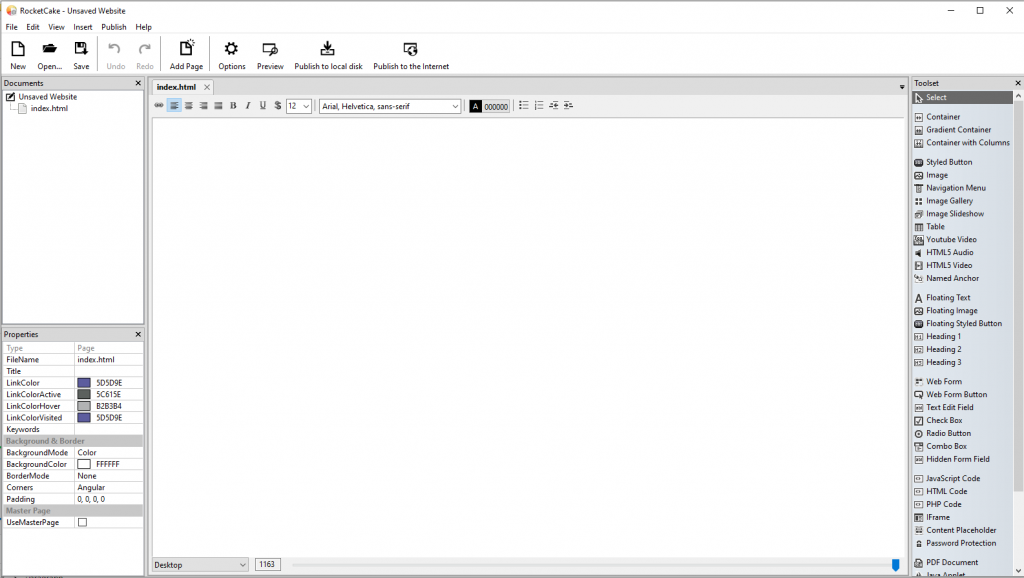
The main interface for RoacketCake is straight forward. On the right we have a menu bar that contains objects that we can drag and drop into our webpage, and on the left, we have a list of the webpages that we have and the properties of our page.
Adding a Title
All website’s have a title or name, so let’s insert a title. My website is going to be called ‘The Alan Turing Fan Page’. From the the right hand menu I’m going to drag the ‘Heading 1’ option into the big white empty webpage.

Select the default text and write your websites header there instead.

We can adjust the size, colour and alignment of our text using the buttons above the title. I’m going to align my title in the centre of the page and make the title red.

Adding a picture
Let’s add a picture of our hero Alan Turing to the webpage. I’ve already downloaded an image of Alan Turing onto my computer from the internet and just want to insert it into the website.
From the menu on the right, drag the Image option onto the page. A box will pop up asking you to select the image you want to insert. Simply select the image you want and click on the ‘Open’ button.

Ooopppsss! Our image of Alan is a little too large – but it doesn’t matter. Simply click on the image and you will be able to resize it to the size you want.

That’s much better!

Adding normal text
To type some standard everyday text into our website all we need to do is click on the page and start writing.

In this example the text has gone to the side of the picture but we can just press return before the text to get the text to go below the picture.

Organising content on the page
Our page looks ok, but what I really wanted was for the welcoming text to be to the right hand side of the picture, not below it. How can we do this? We can use containers with columns to store our picture and our text next to each other.
From the right hand menu, drag the ‘Container with Columns’ option into the webpage.

You will then get a pop up box asking you how many columns you want. Input 2 into this box and leave the other box as it is.

You will now see a transparent box below the text that contains 2 columns.

Simply drag the picture of Alan into the left hand box, resize the picture as necessary then select the text, cut it and insert into the right hand box.

Preview our webpage
We’ve worked hard to create a webpage – let’s take a look at it in our web browser.
Simply click on the ‘Preview’ button on the top bar and your website should load in your browser.


Have a go at adding more things into your website or looking at our advanced RocketCake tutorial for some more advanced features of RocketCake.

