
Taking a screenshot is really easy and allows us to show teachers and other members of staff what we have done even if we don’t have certain programs open.
It’s vital to providing evidence of the work that we have done so below are instructions on how to take a screenshot on a Windows PC.
Method 1 – Print Screen
The easiest method is by using the dedicated Print Screen button.

Hold down the alt key and then click on the prt scr key (this is normally a smaller key at the top right of the keyboard).
This will take a picture of the whole screen.
Go to the application you want to copy the picture to and right click and select Paste or press buttons ctrl and v.
Method 2 – Snipping tools keyboard shortcut
If you want to capture a certain part of the screen then using the snipping tool shortcut might be more useful.

Hold down the windows key, shift key and then press the s key.
The screen will go darker and you will be able to drag your mouse over the area that you want to capture.
Go to the application you want to copy the picture to and right click and select Paste or press buttons ctrl and v.
Method 3 – Snipping Tool from Start Menu
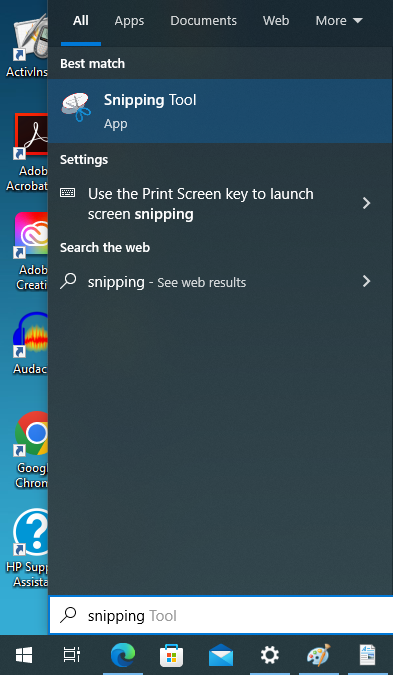
The Snipping Tool app can also be accessed from the Start Menu.
Click on the Start button in the bottom left of the screen.
Type in ‘Snipping’ into the keyboard and the Snipping Tool app should appear at the top of the search bar.
Click on the Snipping Tool app and it should load the app for you to use (see image below).

To take an image of part of the screen click on the ‘New’ button.
The screen will go darker and you will be able to drag your mouse over the area that you want to capture.
Go to the application you want to copy the picture to and right click and select Paste or press buttons ctrl and v.